Hellow Devlopers.
Today, in this post I share with you how to use the Razorpay Payment Gateway Integration in laravel 8 Web Application with easy example.
When you want to use payment gateway in countries such as India, this Razorpay payment gateway will be useful becose the Razorpay payment gateway can also be used in Rupees currency, which is not available in another payment gateway such as stripe and paypal. And it's very easy to use in any programming language. Let's today, we let' use it in laravel 8 web application
Following the simple steps below, you simply integrate Razorpay Payment Gateway into a laravel 8 web application.
- Step 1: Create Razorpay Account
- Step 2: Generate API Keys
- Step 3: Install razorpay package
- Step 4: Config .env
- Step 5: Create Controller File
- Step 6: Create View File
- Step 7: Run Appliction
- Step 8: Preview
Step 1: Create Razorpay Account
First of all, we need to create an Razorpay account, please go to this link https://dashboard.razorpay.com . And get key_id and key_secret from the account setting.
After creating an account, look for the following stap and screenshots to get key_id and key_scricket
Step 2: Generate API Keys
- Select the mode (Test or Live) for which you want to generate the API key.
- Go to Settings ~> API Keys ~> Generate Key to generate key for the selected mode.
- link - https://dashboard.razorpay.com/app/keys


Step 3: Install razorpay package
after create account, than you can install razorpay/razorpay below command
composer require razorpay/razorpay
Step 4: Config .env
After installing razporay you need to Config .env file. Now go to the .env file and Then add the following two line in this file and set the razor_key and razor_secret.
RAZORPAY_KEY=rzp_test_XXXXXXXXX
RAZORPAY_SECRET=XXXXXXXXXXXXXXXX
Step 3: Create Route
Now, after install razorpay package, than go to routes/web.php and open web.php to add 2 route from below.
// Show Payment Form
Route::get('payment', 'PaymentController@payWithRazorpay')->name('get.payment');
// Send Payment Request
Route::post('payment', 'PaymentController@payment')->name('post.payment');
Step 5: Create Controller File
Now, You go to the app/Http/Controllers and create a new file named PaymentController.php and add below code
<?php

namespace App\Http\Controllers;

use Illuminate\Http\Request;
use Illuminate\Support\Facades\Input;

use Session;
use Redirect;
use Razorpay\Api\Api;

class PaymentController extends Controller
{
    public function payWithRazorpay()
    {
        return view('payment');
    }

    public function payment()
    {
        //Input form item
        $input = Input::all();
        //get razor_key_id and razor_key_secret
        $api = new Api(config('custom.razor_key'), config('custom.razor_secret'));
        //Fetch payment information by razorpay_payment_id
        $payment = $api->payment->fetch($input['razorpay_payment_id']);

        if(count($input)  && !empty($input['razorpay_payment_id']))
        {
            try {
                $response = $api->payment
                                ->fetch($input['razorpay_payment_id'])
                                ->capture(array('amount'=>$payment['amount']));

                $id = $response->id;
                $card_id = $response->card_id;
                $status = $response->status;
                $amount = $response->amount;
                $description = $response->description;

                //-------------------------------------------------------------
                // Do something here for store payment details in database...
                //-------------------------------------------------------------

            } catch (\Exception $e) {
                return  $e->getMessage();
                \Session::put('error',$e->getMessage());
                return redirect()->back();
            }

        }

        \Session::put('success', 'Payment successful');
        return redirect()->back();
    }
}
Step 6: Create View File
Now, you have to create a view file for the form show. Go to resources/views/ for it and create cart.blade.php file. Have the cart.blade.php file open and add the code below
<!DOCTYPE html>
<html>
<head>
    <title>Razorpay Payment Gateway Integration In Laravel 8 - phpicoder</title>
    <link rel="stylesheet" href="https://maxcdn.bootstrapcdn.com/bootstrap/3.3.7/css/bootstrap.min.css">
</head>
<body>
<div class="container">
    <div class="row">
        <div class="col-md-4 col-md-offset-4">
            @if($message = Session::get('error'))
                <div class="alert alert-danger alert-dismissible fade in" role="alert">
                    <button type="button" class="close" data-dismiss="alert" aria-label="Close">
                        <span aria-hidden="true">×</span>
                    </button>
                    <strong>Error!</strong> {{ $message }}
                </div>
            @endif
            {!! Session::forget('error') !!}
            @if($message = Session::get('success'))
                <div class="alert alert-info alert-dismissible fade in" role="alert">
                    <button type="button" class="close" data-dismiss="alert" aria-label="Close">
                        <span aria-hidden="true">×</span>
                    </button>
                    <strong>Success!</strong> {{ $message }}
                </div>
            @endif
            {!! Session::forget('success') !!}
            <div class="panel panel-default">
                <div class="panel-heading">Pay With Razorpay</div>

                <div class="panel-body text-center">
                    <form action="{!!route('payment')!!}" method="POST" >
                        <!-- Note that the amount is in paise = 50 INR -->
                        <!--amount need to be in paisa-->
                        <script src="https://checkout.razorpay.com/v1/checkout.js"
                                data-key="{{ env('RAZORPAY_KEY') }}"
                                data-amount="500"
                                data-buttontext="Pay 5 INR"
                                data-name="phpicoder"
                                data-description="Order Value"
                                data-image="logo.png"
                                data-prefill.name="phpicoder"
                                data-prefill.email="phpicoder@gmail.com"
                                data-theme.color="#ff7529">
                        </script>
                        <input type="hidden" name="_token" value="{!!csrf_token()!!}">
                    </form>
                </div>
            </div>
        </div>
    </div>
</div>
</body>
</html>
Note :- When you need $ currency you use data-currency="USD"
Step 7: Run Appliction
ow we are ready to run our laravel applictions using bellow command:
php artisan serve
Now you can open bellow URL on your browser - http://localhost:8000
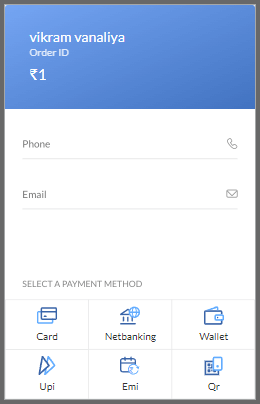
Step 8: Preview

Test Card :-
| Card Network | Card Number | CVV | Expiry Date |
| Mastercard | 5267 3181 8797 5449 | Random CVV | Any future date |
| Visa | 4111 1111 1111 1111 | Random CVV | Any future date |
you need to more card click for below link
https://razorpay.com/docs/payments/payments/test-card-upi-details
I hope this post will be useful to you.


Related Post